

My First 3D Modeling Experience
“Diggy diggy hole.” — Yogscast
Initial Impressions
I started using Fusion 360 by Autodesk yesterday and began to learn how to make some basic shapes and solids. I personally found it pretty annoying that panning the camera and rotating the view in the middle of an action makes it impossible to go back into the original action.
Let’s say that you were creating a hole in a box but you wanted a better view from another angle so you click the icons on the bottom of the screen to rotate and pan the camera. This will actually stop you from being able to reselect the window for the hole-making tool.
Shortcuts and Keybinds
I learned from a YouTube video that I can pan and rotate using the middle mouse button and shift + the middle mouse button, respectively. This method actually does not cause the prior issue of not being able to reselect the hole tool.
I’m not sure why it would happen this way but I would assume that the issue was brought up earlier by the people who actually knew the keybinds already. Before I discuss a structure that I was tasked with replicating, it should be noted that I learned about the keybinds after I learned how to recreate the structure.
Sherlock Holmes and the Case of the Tubed, Opened Box
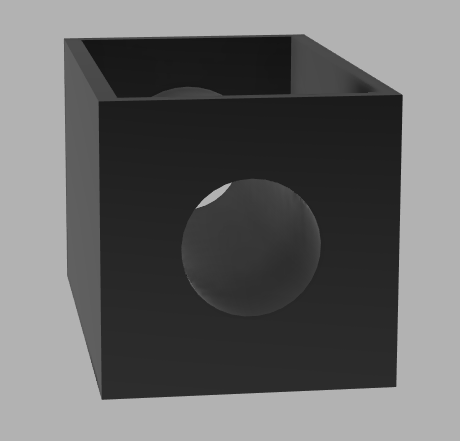
When I was introduced to the software, the first task was to create a box with an open top as well as a tube going through it laterally. Here is an image:
First Attempt
The first option I tried was making a solid cube, and then hollowing out beginning from the top. This achieved the shape of a box with the top opened. Next, I cut a hole laterally from one face to the opposite one. However, I was stuck here with a hollowed box with two holes in the sides.
I attempted to extend the hole from one side to another first by using the extend tool, but the outer area of the hole doesn’t technically exist so that was impossible. Then, I tried to use the pipe tool to create a pipe going from one side to the other. However, the pipe tool creates a pipe along a path, which is unlike the extend tool which lets you drag a shape however far you want in a straight line.
Struggling
Here, I tried to go back to the solid cube and create two points on either side of it such that I would be able to draw a line between them when I had to create a path for the pipe. This was not happening because when I drew the point on one side and then went directly to the other side to put a point down, it would just end up in the same place because it autoselected the first point on the other side.
I did think of a third option, which was making a tube on the side in a straight line and then adding it to the box with two holes by docking it, but that didn’t seem like the way it was intended to work and also I would need to know the dimensions of the hole, which I made with no idea in mind so this strategy would not be adaptable (for lazy people). I know that it is possible to use the measure tool to find the size of the hole but I just did not want to do that.
Second and Last Attempt
I thought of an idea which was that maybe the shell tool that I used to hollow out the cube would not select the hole if I made a hole first. This turned out to be correct and I was able to perform the task quite quickly.
Final Thoughts
Ultimately, this puzzle was helpful for my understanding of the software; it introduced the idea of creating a distinct order for easier design and allowed me to be creative with the ways that I might be able to solve the problem, even if they were wrong.


Leave a comment